Home / The Injection Room / How do I take before and after photos that will hold up as clinical evidence later?
checklist
How do I take before and after photos that will hold up as clinical evidence later?
Consistent framing, fixed lighting, a neutral background and a locked focal length are what turn a snapshot into a record you can defend and a comparison you can market.
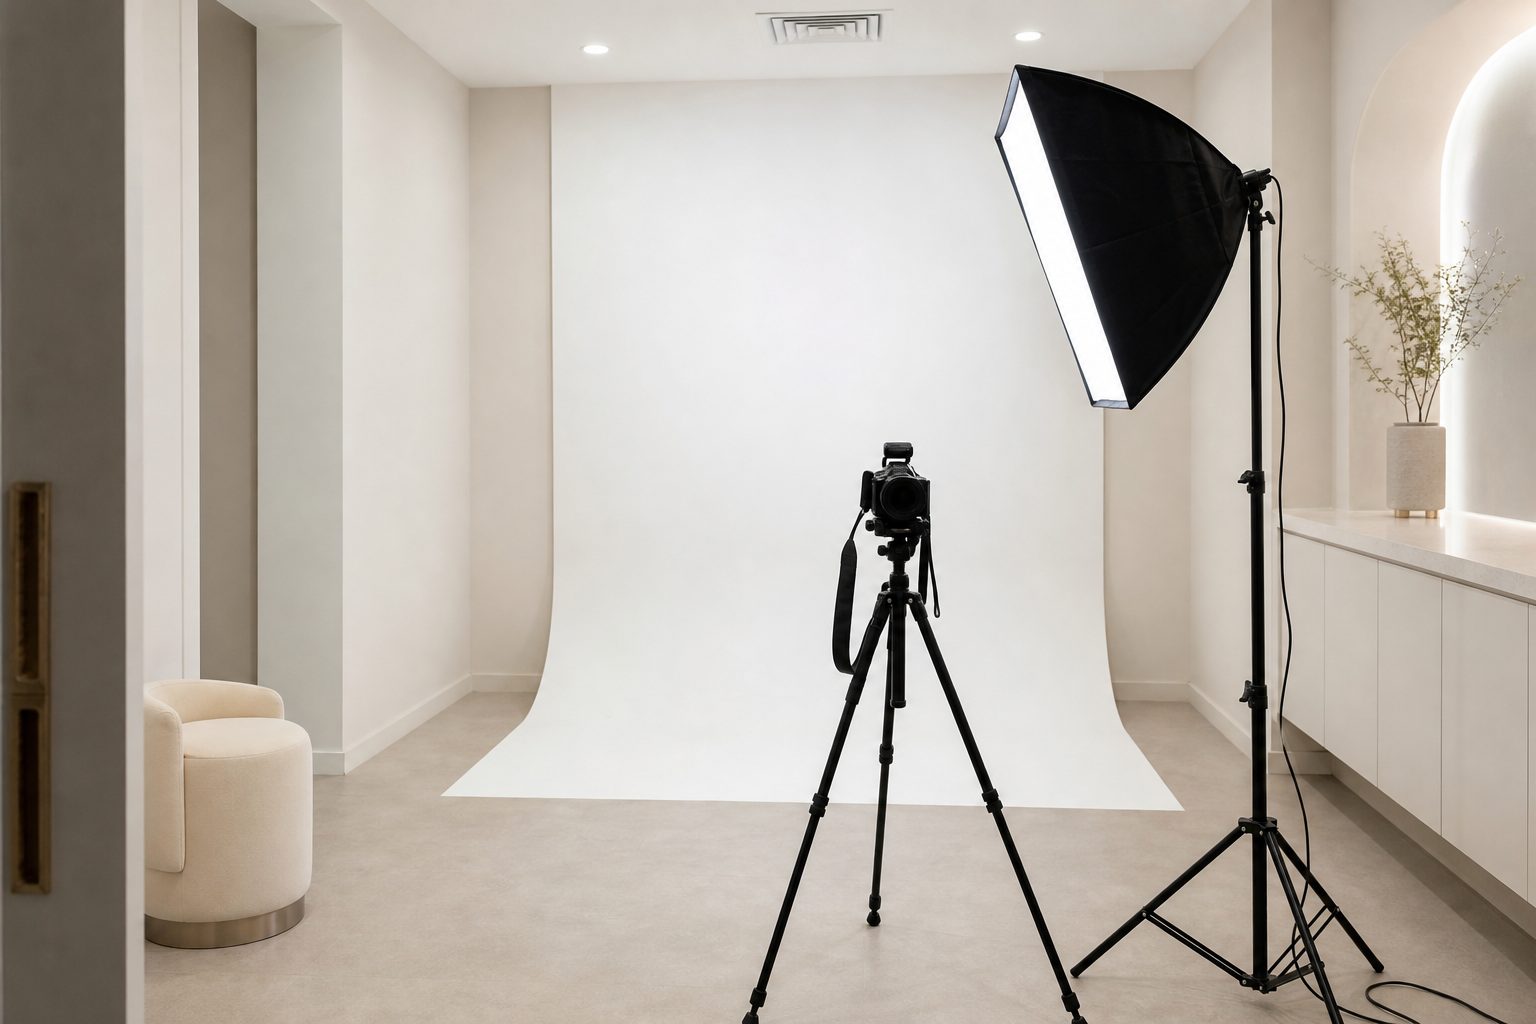
A photograph holds up as clinical evidence when the only thing that changed between the before and the after is the patient. Same distance, same height, same focal length, same lights, same background, same expression instructions, same file naming, same chart linkage. Everything else is a snapshot, and a snapshot proves nothing when a patient tells you six weeks later that her brow sat differently before you touched it.
This is not a photography problem. It is a repeatability problem, and repeatability is a protocol, not a camera. A staff member with a locked down phone rig and a taped floor mark will produce more defensible images than a talented injector shooting freehand in whatever light the treatment room happens to have that afternoon.
Below is what to fix, in the order it matters, and a checklist your front desk can run without you standing over them.
Fixing camera distance, height and focal length
Perspective distortion is what ruins comparison photos. Move the camera closer and the nose grows relative to the ears. Move it back and the face flattens. If the before was shot at three feet and the after at five, you have documented a change in lens geometry, not a change in the patient.
Lock three things and never touch them again.
- Distance. Tape a mark on the floor for the patient's toes and a second mark for the tripod legs. Measure once, write the number on the wall behind the camera.
- Height. Set the lens at the patient's outer canthus level with her seated. Note the tripod column height and lock it.
- Focal length. On a phone, that means committing to one lens and never pinching to zoom. On a dedicated camera, tape the zoom ring or use a prime.
Seated is better than standing because seat height is repeatable and posture is not. A stool with a fixed height and a back that keeps her from leaning in removes two variables at once.
The phone question
A current phone is adequate if you disable the features that fight you. Turn off any beauty or smoothing mode. Turn off high dynamic range if it is aggressively lifting shadows, because shadow depth is exactly what you are trying to hold constant. Lock exposure and white balance rather than letting the camera decide per frame. Then treat the phone as a fixed camera on a tripod, not a handheld device.
Keep reading: What actually happens in the two weeks after a filler treatment, and when is a touch up appropriate?
Lighting that removes shadow variation between visits
Window light is the enemy of comparison. It changes with the hour, the season and the weather, and a rhytid photographed in raking afternoon light looks dramatically deeper than the same rhytid at ten in the morning under overcast sky.
Kill the ambient contribution and use only lights you control. That means shooting in a spot where you can close a blind, and using two matched sources at fixed positions rather than one. Two softboxes at roughly forty five degrees to either side, at face height, gives you even illumination with enough modeling to show contour without carving false lines.
Mark the light stand positions on the floor in tape the same way you marked the tripod. If a light gets moved for a room clean, the tape puts it back.
Set a fixed white balance rather than automatic. Automatic white balance will neutralize a genuine change in erythema, which is sometimes the very finding you wanted to document.
Neutral background, hair control and makeup removal
A mid tone neutral background, gray or a very soft blue, is more forgiving than pure white. White backgrounds bounce light back into the face and blow out in ways that vary shot to shot. Keep the patient at least two feet off the background so her own shadow does not land on it.
Hair back, every time, with a headband kept in the photo area rather than borrowed from her bag. Ears exposed. Jewelry off, because earrings catch light and draw the eye in an after photo that is supposed to be about the midface.
Makeup off is the rule that gets skipped and the one that most often destroys a comparison. Foundation fills fine lines and concealer removes tear trough shadow. If your before is bare and your after is done, you have documented cosmetics. Keep remover wipes in the photo corner and build the time into the appointment.
The standard view set: front, three quarter, profile, animation
Shoot the same set every time, in the same order, so nobody has to remember what is missing.
- Frontal at rest. Eyes open, gaze at the lens, jaw relaxed, teeth apart, lips together but not pressed.
- Right three quarter and left three quarter. Have her rotate to a fixed reference, for example until the tip of the nose aligns with the outline of the far cheek.
- Right profile and left profile. Ear fully visible, Frankfort horizontal plane level, which in practice means chin neither lifted nor tucked.
- Animation views where relevant. Maximum frown, maximum brow elevation, full smile for crow's feet, clench for masseter, and for platysma, a strong grimace against resistance.
Animation views are where injectors lose arguments, because a patient's maximum effort varies with how hard you coached her. Standardize the instruction word for word and put it on a card taped to the back of the camera. Same sentence, every visit, every staff member.
Keep reading: What does it really cost to open a single room injectable practice in the United States?
Naming, dating and linking images to the treatment record
An image with no reliable link to a treatment record is close to worthless as evidence. The chain you need is: this patient, this date, this product, this lot, these injection sites, these photographs.
If you are naming files by hand, pick a scheme and never deviate. Patient identifier, date in ISO order so files sort chronologically, view code, and sequence. Something like PT10428_2026-03-14_FRONT_REST_01. ISO ordered dates matter because 03-14 and 14-03 will eventually collide when someone types fast.
Better than manual naming is capture inside the treatment record itself, so the image inherits the patient, the date, the injector and the product lot without anybody typing. Every manual step is a step that gets skipped on a busy Friday.
Consent scope: chart use versus social media use
These are two different permissions and they must be documented separately. Consent to photograph for the medical record is part of treatment documentation. Consent to publish is a separate, specific, revocable authorization, and under HIPAA marketing use of identifiable images requires a written authorization from the patient.
Your publication consent should name, at minimum:
- Which channels are covered, your website, social accounts, printed material, paid advertising.
- Whether the face may be shown in full or must be cropped.
- Whether the patient's name or first name may appear.
- Whether the images may be used after she stops being a patient.
- How she revokes permission, in writing, and what happens to material already published.
Record the revocation path honestly. You can pull a post. You cannot recall a screenshot somebody already took. Saying so up front is both accurate and protective.
One more scope question people forget: staff phones. If images are captured on a personal device, they exist outside your system the moment they sync to a personal cloud account. Either capture on a clinic owned device or capture into an application that does not write to the device camera roll.
See how InjectConsent handles this for medical aesthetics and injectables
Storage, backup and HIPAA obligations for image files
Clinical photographs of an identifiable face are protected health information. Treat the image store with the same seriousness as the chart.
Practically, that means access limited to the people who need it, individual logins rather than a shared clinic password, encryption in transit and at rest, and a backup you have actually tested by restoring something. An untested backup is a belief, not a control. If you use a third party service to hold the images, you need a business associate agreement with that vendor.
Set a retention position too. Decide how long images are kept, align it with your state's medical record retention requirement, and write it down. Ad hoc deletion by whoever needs disk space is how the one photo that mattered disappears.
A pre shoot checklist the front desk can run
Print this, laminate it, hang it in the photo corner.
| Step | Check | Why it matters |
|---|---|---|
| 1 | Photo consent on file and current for this visit | Chart consent and publication consent are separate |
| 2 | Makeup fully removed, skin dry | Foundation fills lines and invalidates comparison |
| 3 | Hair back with clinic headband, ears exposed, jewelry off | Removes reflective and framing variables |
| 4 | Patient seated, toes on floor mark, back against stool | Fixes distance and posture |
| 5 | Blinds closed, both softboxes on, stands on tape marks | Ambient light changes hour to hour |
| 6 | Camera on tripod marks, height locked, zoom untouched | Prevents perspective distortion |
| 7 | Exposure and white balance locked, smoothing off | Automatic settings hide real color change |
| 8 | Shoot the full view set in fixed order | Missing views cannot be recreated later |
| 9 | Read animation instructions from the card, verbatim | Effort varies with coaching |
| 10 | Images attached to the treatment record before the patient leaves | Unlinked images are not evidence |
Making it survive a busy day
Every item above is easy in isolation and fragile in combination, because the day the schedule runs forty minutes behind is the day the makeup wipe gets skipped and the photo never gets attached to anything. Protocols that depend on memory decay. Protocols built into the visit flow do not.
That is the case for capturing the photo where the rest of the record already lives. InjectConsent takes the signed consent, the product lot number, the mapped injection sites and the before image in the same two minutes as the treatment, so the image arrives already linked to the patient, the date and the product. Start with the floor tape and the light marks this week. Then close the gap between the camera and the chart, and the record will be there when you need it.
Read also
More from The Injection Room

What actually happens in the two weeks after a filler treatment, and when is a touch up appropriate?
Swelling, bruising and product integration follow a rough timeline. Knowing that timeline is what keeps you from correcting a result that has not finished settling.
What does it really cost to open a single room injectable practice in the United States?
Buildout, licensure, malpractice, opening inventory and a medical director retainer form the bulk of the number. Here is how each line item is structured and what moves it.
How did one clinic cut its charting time to under five minutes without losing any detail?
A three injector practice rebuilt its treatment record around capture at the chair. The change was sequence, not software: consent, lot and photo before the first needle.